Showing posts with label recipes. Show all posts

Wednesday, February 26, 2014

Pork, spinach, feta and pear sausage rolls.


As a mum of two, I can confidently say that some of the most rewarding and fulfilling moments that I have enjoyed are the one's that centre around feeding my family.
To me food is not just sustenance, it's also a declaration of my love for my tribe. And by tribe I also mean my friends and their families.
Food is love...good food, made with care for the one's you hold most dear.
Whether it's cooking with my children and passing on family recipes and techniques or simply cooking FOR them, there's not too many moments these days where we are all centred around the family table at the same time.
Life is busy, hectic and at times down right insane......you all know what I'm talking about.
I enjoyed a yummy meal tonight with my girls, hubby MIA,  probably on his way home from a long day at work. Not unlike every other night, we try our best to have at least one meal, each week day, all together.
Some days there is happy chatter and catching up on the events of the day; these moments usually occur when all of the stars align at just the right moment ( the food is well received!) and all parties have had an awesome day and are in good moods!!
Other days there are cranky kids, who don't want to eat what I have cooked, making for a cranky mum and dad who are left wondering why can't we all just GET ALONG?? REALLY???? It's the one time of the day we get to all be together, sitting, without distraction and the food becomes a battle of wits between the kids and the parents.
My kids are older now, and I'm proud to say there are not too many things that my kids won't eat...mushrooms for example.
But I find as the main food prep slave in the house, I do get stuck in a rut and struggle to keep things interesting at the dinner table. Sometimes I find myself on Pinterest scanning through all the beautiful food styling and recipes, I'm pinning like a woman possessed yet don't seem to get around to actually making anything I pin.
My compromise tonight was to take a recipe I found on Pinterest and tweak it to my liking.
SUCCESS!! Not only did my kids eat it without complaining, they actually went back for seconds and thirds. The recipe even made enough for the kids to take some for school tomorrow, as long as hubby doesn't go in for seconds.
UPDATE: Hubby only left two sausage rolls for the kids to fight over.


Pork, spinach, feta and pear sausage rolls.
Makes 16 rolls.


300g frozen chopped spinach, defrosted and squeezed dry
500g ground pork sausage
1 cup of crumbled feta
1 cup of Panko breadcrumbs
5 green onions, chopped
1 red pear, finely diced
2 tablespoons of Italian seasoning
salt and pepper

1 pkg pre-made puff pastry, defrosted
1 egg, beaten
Parmesan cheese

Preheat your oven to 375f and line a large baking tray with parchment paper. 
I found that during baking the sausage roll released a lot of oil, so use either a tray with sides or place another tray underneath to catch the hot oil.

In a large bowl combine the sausage, spinach, feta, breadcrumbs, onions, pear, Italian seasoning, salt and pepper.
Mix well.


I used plain old No-name frozen spinach, Maple leaf pork sausage, Skotidakis feta and Presidents choice frozen puff pastry.


Cut the pastry sheets in half. 


Divide the spinach mixture into 4 equal portions, place down the centre of each of the 4 pastry halves. 


Brush a little of the beaten egg along the longer edge and roll to cover the filling.

Cut each roll in half so that you have 16 rolls and place them, seam-side down, on the prepared baking tray.


I scored and x into the top of each roll, brushed each roll with beaten egg and sprinkled with Parmesan cheese. Bake for 25 -30 minutes, until golden.


I served these hot from the oven with a side salad full of veggies, mango and more feta and some homemade tomato chilli jam.
nom nom!!!!

Tuesday, December 11, 2012

Blueberry sour cream scones

I visited with a bunch of great ladies this morning at my pal Alison's house for a mug of coffee and baileys lovely tea.
It was so nice to come out of my cave and get out and visit over some yummy morning nibbles and great conversation. I tried out a new scone recipe as I was, as usual, not very organised and had not planned ahead my treat to share with the ladies.
This one came together very quickly and I timed it just right so that I could deliver a steaming plate full of yummy blueberry scones to the gathering. Mind you, they did make me half an hour late as I don't normally do the wedge style scone and I had to pull them out of the oven, separate them and give them a quick flash in the oven to be sure they were fully cooked through.
I had a few requests for the recipe, so here 'tis ladies, with a few alterations.

I got this recipe from a website called Chef in you, I'll be heading back there after I finish this post to go check out some more recipes.
Click on the pic to be directed to the recipe, I had to nab the pic from their website as  I didn't take one of my own this morning.....as I was running late remember!!!!
Then scroll down to see what I did differently.

Blueberry Scones with sour Cream

So instead of 2/3 cup of sour cream, I used 100ml of strawberry yogurt and then made up the rest with sour cream to get the correct amount.
I also used full fat sour cream. Did I tell you this is not diet friendly already?
I also upped the amount of sugar from 3 tablespoons to 6 tablespoons!!

THEN, I made a vanilla bean drizzle to go on top of the warmed scones..........drool!

Vanilla Bean Drizzle.

5 tablespoons of icing sugar
1 teaspoon of Madagascar Vanilla
a pinch of vanilla bean seeds. ( I have something like these in my pantry)
add a tiny bit of milk until you get the "drizzle" consistency you like.

If you don't have the vanilla bean seeds don't worry, the recipe is just as yummy without it. They just had an extra hit of vanilla flavor and the seeds looks so great in the drizzle.
Easy!!

Monday, February 6, 2012

Roasted Cauliflower poppers.

Dear fellow bloggers....
Don't you hate it when you start a recipe and are being so dedicated to taking pictures every step of the way. Always thinking in the back of your mind about how to best demonstrate a recipe in pictures and instructions to your viewers so as to make it a pleasant experience for all those involved.
And then the recipe turns out super awesome, you take a taste to be sure that it is indeed a recipe that is worthy of sharing, one that you are proud of and are so excited to share and then DUN DUN DUUUUN!!!
You forget to take a picture of the finished product because you are too busy eating it!!!

Please tell me I'm not the only one out there that does this...you all make it look so easy and flawless, like it's as simple as taking your next breath without having to think about it.

I made the current low carb and low point Internet favorite of the week. Roasted cauliflower poppers. Sound intriguing?
These nummy little goodies seem to be literally popping up everywhere I look, so I just had to try them out for myself to see what the big deal was all about. I'm so glad I did because I loved them. Super easy, super quick and very satisfying. Maybe not for every one's taste buds but a big thumbs up for mine.
I was even able to get the kids to give them a try.


Here's the before pic, they already look super tasty. Just picture them hot and steamy. 
There are lots of recipe's online for cauliflower poppers but to put it simply, all you do is cut up cauliflower into bite size pieces, toss with olive oil and you favorite seasonings ( I used a barbecue rub I picked up at Bass Pro shop)  and bake in a 350c oven until cooked through.

They make a great snack or appy, even a side dish. They have zero points if you are on weight watchers , are low calorie and low carb. Not much more to say really....other that num num!


Monday, January 30, 2012

Nom, nom......winter food.


Mmmmmmmmmmmmmmmmmmmm Perogy how I luuuurve thee. Empty calories all rolled into one delicious little package.
We made and served these little babies to the guests at our back yard wedding reception in Australia 12 years ago. The Aussies loved them, these strange, foreign, delicious pockets of potato. I think it made my hubby proud to share a little something from his native land and have it so well received. He also made his famous creamy mushroom perogy sauce, don't ask for the recipe, it goes to the grave with him.
We've not made them since then.....and now I know why. Because they are a lot of work!!!
Totally worth the effort though, just like homemade ravioli and bread baked from scratch. And what a great opportunity to teach the kids the difference between store bought and good down home cookin'.
There's an art to the forming of them, I was certain that after making 100 or so I'd have it all figure out.......NOPE.


They don't look at all bad and they tasted mighty fine but I absolutely must invite my adopted Ukrainian mother over and have her show me all her secrets.
We decided after returning from our last trip to Australia that every weekend would involve a new family recipe, we either make copious amounts of something we know and love or agree to experiment and hopefully create the next recipe to be added to our family cookbook. The weekend before it was lasagna, this weekend was perogies and next weekend is undecided. Any suggestions?


Anywho, back to the Perogies. So we made potato and cottage cheese, potato and bacon, potato with sauerkraut and bratwurst and my all time favourite...potato and roasted pumpkin...we were literally fighting over these ones, forks in hand.

I have a dough recipe to share, this is a new one that was passed on by my mother in law. I hope she doesn't read this, she really is not a random recipe sharer. Usually you have to marry into the family for her recipes so don't go telling Gramma Le!!!

Perogy Dough

6 cups all purpose flour
2 tsp salt
3/4 cup of oil ( I used a canola/olive oil blend)
1 1/2 cups mashed potatoes

Mix all ingredients together.
Add approximately 2 cups of warm water until texture is soft but not real sticky. I used my kitchen aid stand mixer with the hook attachment and then turned the dough onto a floured surface for a quick knead. If it feels too sticky, add a bit of flour.
For best results let sit covered for 1/2 hour. Dough can be frozen or refrigerated.
If refrigerated, take out 1/2 hour before. If frozen, take out the night before.

I found this dough to be very elastic and to be a bit tricky to work with at first. But after a while (100 or so perogies), you get the hang of things.....trust me.
For those of you who know how to make perogies you can stop reading here..the rest of you still wondering what the heck to put in the dough..follow me.
The recipes below came with the dough recipe, I have to tell you that we did not follow any of these recipes, not because they are bad but simply because the hubby wanted to create his own.
These are simply a guideline. Does that sound like a decent disclaimer??? Done!

Fillings:

Dry cottage cheese: Mash the cottage cheese, add salt and pepper, onion flakes, dill  (optional). Or, add mashed potato which helps keep the perogy together.

Cheddar Cheese: Grated cheddar cheese, mashed potato, salt and pepper, minced onion. Bacon is also welcome here!

Sauerkraut: Drain and fry sauerkraut. Add chopped onion, mashed potato, salt and pepper to taste.


Once you've made your perogies you can boil or fry them and sit down like a piggy and eat them all. Or like we did, you can eat SOME and then freeze the rest on baking trays and later; transfer them to ziploc bags.
From frozen, we like to gently boil them first and then fry them in a hot, oily pan with a little salt and pepper.


Soooooooooooooooooo goooood! Tootles.


Monday, September 12, 2011

Goodies from the greenhouse

The hubby worked his butt off this spring to build us the cutest little greenhouse on the block, complete with glass french doors and little glass windows. I was also the recipient of some cedar raised beds for mother's day this year, just in time for planting the beets and carrots. I am now a greenhouse/hot house LOVER.
Check out this pic from spring.....so orderly and cute!!!


And this pic from yesterday.....it's like a jungle in there.


We have a small deer and bear issue in our neck of the woods which can make veggie gardening a bit frustrating, I don't mind sharing the fruits of our labour with the wild life, I just don't appreciate the mass destruction that follows after they have had a snack.
So the greenhouse has not only sped up the growing process but kept our precious tomatoes safe from harm.

Last night I whipped up a quick side dish with some of our delish tomatoes.

I call it tomato pie, it's not really a pie but I remember my mom making something similar when I was a kid.
This is my take on her dish using lots of yummy seasonal stuff from our garden.

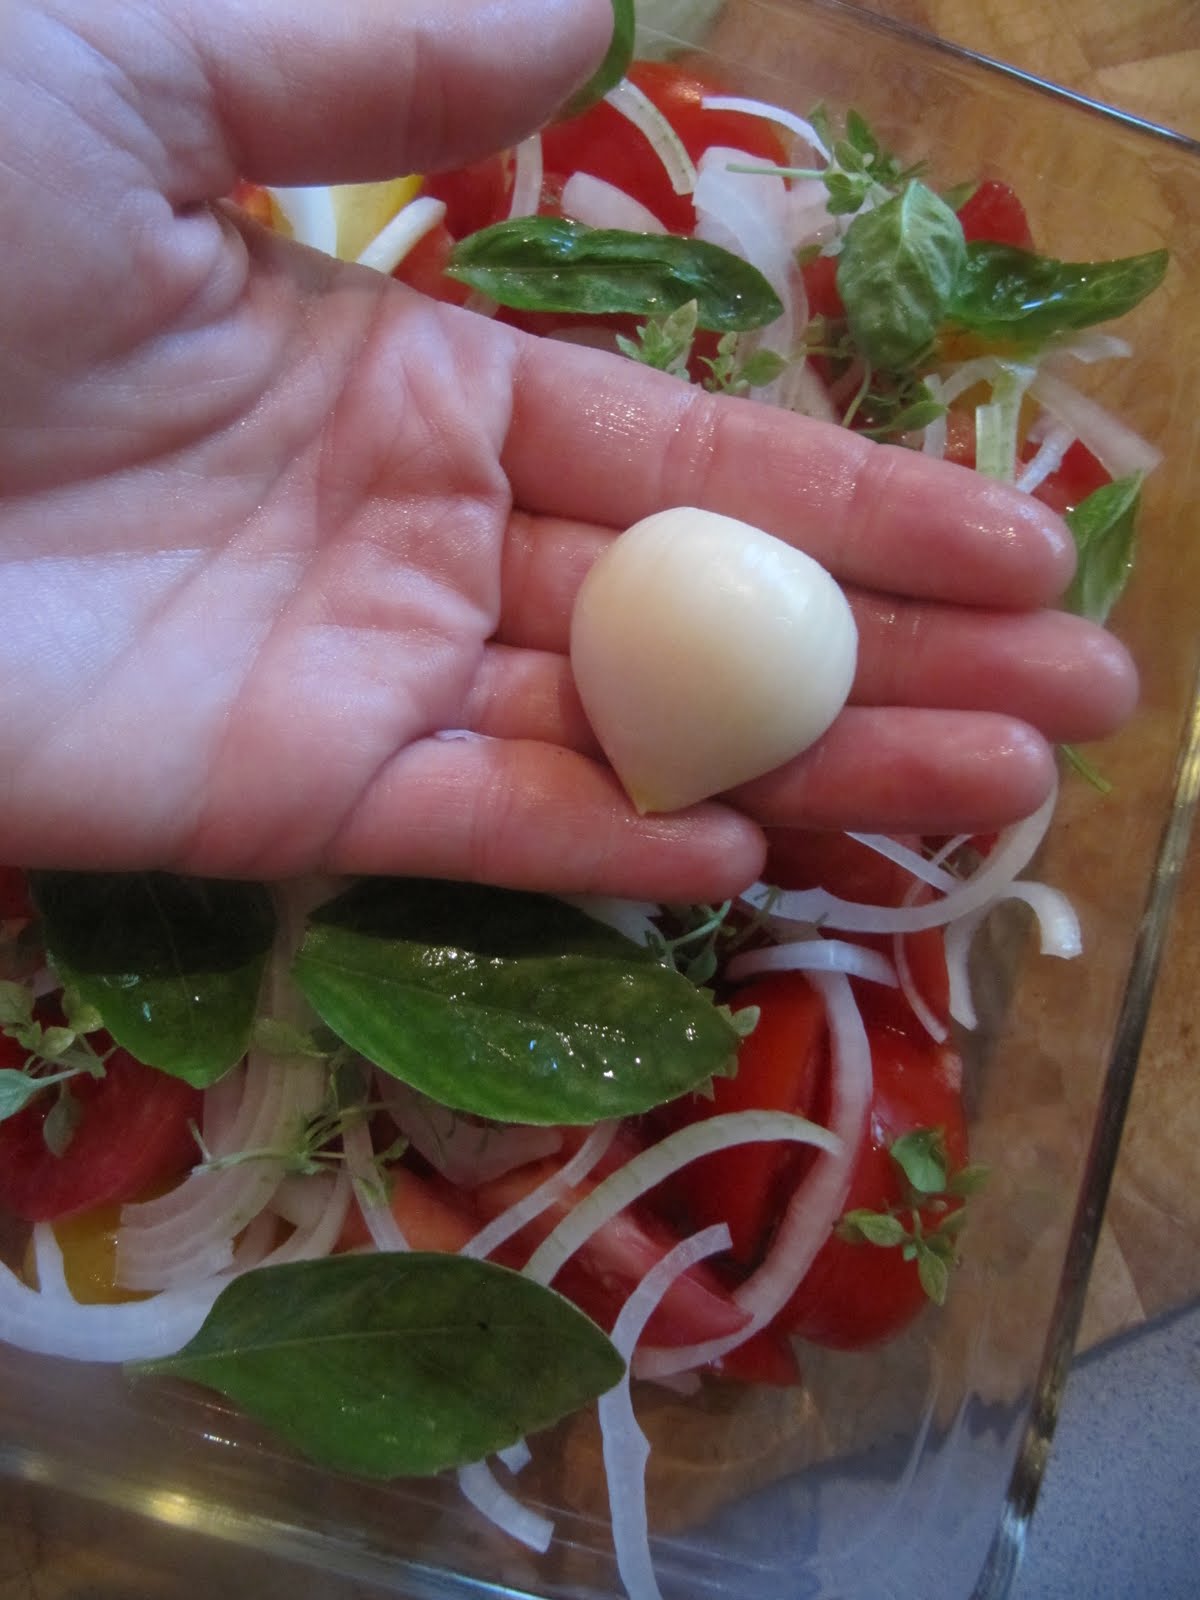
In a baking dish; roughly chop fresh tomatoes, onion, basil, garlic and toss in olive oil, parmigiano reggiano, salt and pepper.
Check out this bad boy from our garden, I just sliced him into little garlic discs...soooo good.


Drizzle with balsamic vinegar.


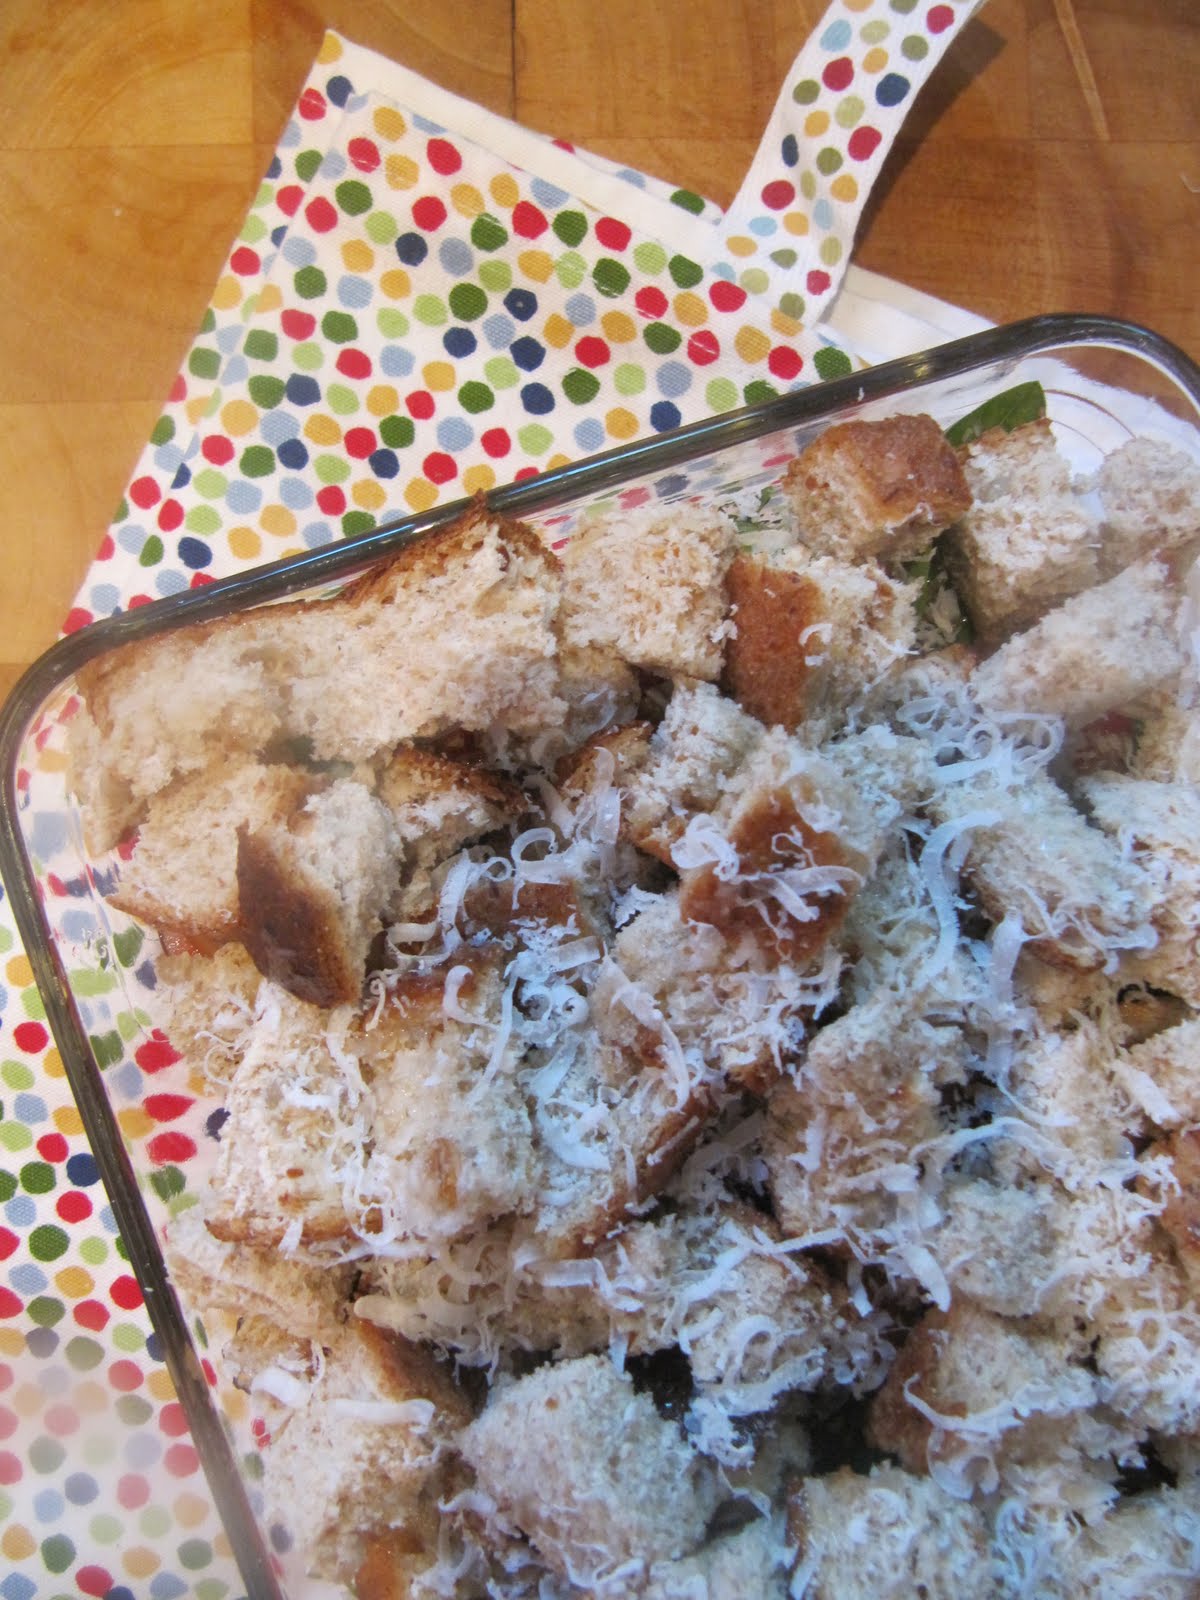
Then in a bowl cube some day old or crusty bread (I used plain old ancient grain sliced bread), toss with some olive oil and spread onto veggies. Grate some more cheese on top and bake in 350c oven until bread is toasty crunchy and tomatoes are mushy!! (like my vast knowledge of cooking terminology???)


I forgot to take a post oven pic but in reality it looks a lot like the pic above just steamier and crunchy browned!! K, I need to stop talking!!

Happy harvesting y'all!!

Thursday, September 8, 2011

Chocolate Zucchini Loaf

Usually at this time of year offers are coming in from all directions in the form of free zucchini. Overzealous gardeners like myself who think that just one plant is not going to be enough....so we plant three and then end up with enough veg to feed a small nation of vegetarians.
I am not one to turn away free food so I have gotten into the habit of freezing and preserving food in abundance for later use, almost to the point of excess (just take a look at my pantry!!)
One of my favourite uses for zucchini is grating it and freezing for later use. I never feel like baking in the summer however with the kids back in school this week it is definitely time to dust off the apron and the mixing bowls.
I managed to bake this morning in between painting window frames and mowing the grass, froze a large Chocolate zucchini loaf, however I soon realised that I would need a little something to take to the PAC meet and greet with our new principal. Ain't that just perfect!!!
Meeting went great, sold some jam to a fabulous customer and got requests for the loaf recipe, what a great start to the school year...so here it is ladies


Chocolate Zucchini loaf.

3 eggs
1/3 cup oil
1 1/2 cups sugar
1 1/2 cups of unsweetened apple sauce
2 tsp vanilla

2 1/2 cups flour
1 1/2 tsp baking powder
3/4 tsp salt
1/2 cup cocoa powder
1 tsp baking soda
1 tsp cinnamon

2 cups grated zucchini
1/2 cup chocolate chips

Preheat oven to 350c
Grease and flour two loaf pans or one 15 x 10 Pyrex baking dish.(I prefer the Pyrex and the cake cooks quicker and more evenly)

Cream the eggs, sugar, apple sauce, oil and vanilla in a mixing bowl.
Add zucchini.
Sift the dry ingredients and add.
Fold in the chocolate chips.

Bake for 50 minutes in loaf pans or until a tooth pick comes out clean.
Baking time varies depending on the size of your baking dish. So check after 20 minutes with a tooth pick.

This loafs freezes very well and I actually prefer the moisture of the cake after it has been defrosted.
The applesauce helps to cut down on the fat and oil content...so don't feel too guilty when you have your second or third piece with your morning cuppa.

Enjoy*

Thursday, March 17, 2011

Cookie pops and book worms.

Last night I helped run a bake sale at the elementary school for the annual "Battle of the books". Zoe has entered this fun event for the last two years, anything to get her reading more books is a bonus as far as I am concerned. She loves reading but having someone else pick the books is fantastic, it's like a tween version of my adult book club.
Her team didn't win but they had a fantastic time which makes all the effort worthwhile.
So I baked my butt off yesterday, green jelly slice for Saint Patrick's day, lemon cupcakes with mango frosting and chocolate mint cookie pops.
I love bake sales, seeing all of the fun and fantastic things other people create, some healthy and some not so healthy (mine). A big thank you again to all the wonderful ladies who contributed to the sale.


Isabelle's yummy beer buns were a hit with the ladies. I must have this recipe Isabelle!!!!
And her chocolate cookies, a few ended up coming home to my house.


Get a load of these meringue nests with cadbury mini eggs, these things disappeared very quickly. What a cute Easter idea, way to go Natalie.


My treats were the one's all full of food coloring to get the kids all razzed up. Nothing like a hit of green and red food dye to get the kids going!!!


Cookie pops are my new thang!!!


Here's the recipe.

Chewy chocolate sandwich cookies (womansday.com)

Recipe Ingredients

2 bars (4 oz each) bittersweet chocolate, broken into 1-in. pieces
2/3 cup sugar
2 large eggs
2 Tbsp butter, softened
1 tsp vanilla extract
1/2 cup all-purpose flour
1/4 tsp each baking powder and salt
1/2 cup mini–semisweet chocolate chips


Mint or Coffee Buttercream Frosting


Recipe Preparation


1. Heat oven to 350ºF. Line baking sheets with nonstick foil or parchment paper. Put chocolate in large glass bowl. Microwave on high 1 minute, stirring every 20 seconds, until chocolate is melted and smooth.


2. Stir in sugar, eggs, butter and vanilla; mix well. Stir in flour, baking powder and salt until blended. Stir in mini-chips.


3. Drop level tablespoons 11/2 in. apart onto prepared baking sheets. Bake 10 minutes until cookies are puffed and set. Cool on baking sheet 2 minutes before removing to wire rack to cool completely.


4. For each sandwich, spread 1 Tbsp buttercream frosting onto bottom of cookie; add a popsicle stick, coffestir stick or lollipop stick,press another cookie on top. Refrigerate in an airtight container with wax paper between layers.


Buttercream Frosting.

 
3 oz cream cheese, softened
2 Tbsp butter, softened
2 cups confectioners’ sugar
1 Tbsp milk
1⁄4 tsp vanilla extract


Recipe Preparation


Mint Use 1⁄4 tsp peppermint extract instead of vanilla; add a few drops of green food color.
Coffee Dissolve 1 Tbsp instant coffee in 1 Tbsp hot water; add instead of milk.
Apple Instead of milk, add 1 to 2 Tbsp apple juice until spreadable.

Sunday, March 13, 2011

Flour less peanut butter cookies.

I have to be honest here, I am not a fan of peanut butter flavoured things, Reese's peanut buttercups make me gag....too much peanut....however today I made some cookies that even I enjoyed.


I'm sure my family thought all of their Christmases had come at once as I'm also not a cookie person, but to avoid another trip into town for school lunch supplies I hit my recipe stack full of untested recipes. I think I may have found a keeper, this recipe has only four ingredients, all of which are a constant in my pantry...peanut butter, brown sugar, eggs and baking soda.
All things considered I was feeling pretty proud of myself today until I remembered that peanuts and school do not mix. So I will pick another recipe tonight that is more school friendly and bake while the kids are in bed.

For now here's the cookie recipe that's a keeper! Flour less peanut butter cookies.

2 cups of smooth peanut butter
2 cups of brown sugar
2 eggs
2 teaspoons of baking soda

Preheat oven to 350f.
Beat peanut butter, sugar, eggs and baking soda for 2 minutes or until smooth and blended.
Drop level tablespoons of dough 2 inches apart onto ungreased baking sheet. bake for 10 minutes or until cookies are slightly golden. Cool for 5 minutes on the baking sheet, remove to wire racks and cool completely.

The cookies were great just like that but I couldn't help myself and made a chocolate ganache for half of the cookies to push the yummy factor way over the edge.

Sunday, January 23, 2011

Short cut lamingtons

I know, I know.......I've been a bad blogger. Sorry everyone, can I make it up to you with a recipe? I promise it will be fun and even more importantly..very, very messy.
You up for it?

All my Aussie friends, pay no attention to this one as I'm sure you can make lamingtons with your eyes closed..UNLESS...you have not discovered how much easier it is to cheat and use a cake mix.


LAMINGTON: a sponge cake in the shape of a cuboid, coated in a layer of traditionally chocolate icing then desiccated coconut. Lamingtons are sometimes served as two halves with a layer of cream and/or strawberry jam between, and are commonly found in Australasian outlets such as cafes, lunch bars, bakeries, and supermarkets.


So to start with simply follow your cake mix instructions and bake in a 9 x 13 pan.
Once you cake has cooled slightly, wrap it in plastic wrap and place in the freezer for a few hours, this will make slicing the cake easier and it will also hold together better when dipping it into the icing mixture.

Unfortunately I didn't take pictures of the dipping and coconut slathering so you'll just have to trust me and use your imagination on this one. Alternately you could also follow this link to a more detailed explanation.

For the icing you will need:


•500g (1Lb) icing sugar
•1/3 – 2/3 cup of cocoa(sifted)
•15g (1/2oz) butter
•1/2 cup milk
3 cups of dessicated coconut (sweetened)

Heat the milk slightly and add butter, stir until butter is melted. Add icing sugar and cocoa to the milk mixture and stir until combined. If your icing is runny, then good, that's what it's supposed to look like.

Now this is the messy part, be warned though. It VERY tempting to lick your fingers at this stage of the game...be strong and wait till the end!!!
Take a wee small square cake and dip it into the chocolate icing making sure to cover all sides, quickly take the square, (I used chopsticks for this part)and roll it in the coconut, making sure to cover all six sides, gently patting the coconut into the icing.
Place on a wire rack to firm up. Once you have dipped and covered all squares feel free to lick your fingers, savour the moment.
I like to keep my lamingtons in the fridge, it makes the icing firm up and having the coating of chocolate and coconut around that cake keeps it nice and moist.


Get a load of that will ya~!!!!!!!!!

Monday, November 15, 2010

Banana - Vanilla bean - Chocolate chip pancakes

Super bargain....a whole jar of pure vanilla bean seeds for $9.99....gasp!!!! I found these at HomeSense the other day and after doing the happy dance in the middle of the store I couldn't wait to get home and try them.
 I was a little suspicious as to whether they would have as much oomph as a fresh split bean so I tried out a new pancake recipe this morning....pleasantly surprised!!
On the jar it says 1/4 teaspoon of these babies is the equivalent of 1 teaspoon of vanilla extract.


Aren't they beautiful?


 I mixed them in with the mashed banana and let them sit for a few minutes.


Topped the pancakes off with a few dried bananas and some pure maple syrup.....mm mm I'm hungry again just looking at them. These would go fabulously with a toasted marshmallow milkshake from Joy the baker.

RECIPE: (adapted from The all new Good Housekeeping cookbook).

1 Cup all purpose flour
2 tablespoons sugar
2 1/2 teaspoons baking powder
1/2 teaspoon salt
1 1/4 cups milk
3 tablespoons butter, malted
1 egg, lightly beaten
1 banana, mashed
1/4 tsp vanilla bean seeds
1/2 cup or so chocolate chips, 5ish per pancake

Combine dry ingredients in a bowl, add milk, butter, egg, banana and vanilla seeds,(mix seeds with banana mash).
Stir until just combined.
I'm sure you all know how to cook a pancake so I'm not going to explain the rest of the process, you're too smart for that!
When cooking pancakes, before the big flip, sprinkle with chocolate chips. You could always add the chocolate chips to the batter too if you like.
I had some dried banana chips on hand so I added them as garnish with maple syrup.

Now get in your cars and get to HomeSense!!!!


Yumminess...

I've been ogling the wonderful goodies over at Joy the Bakers blog, hoping to find some yummy recipes for Xmas gift goodies.  I found that... and then some.
If you haven't already seen her blog then you are truly missing out, you must stop what you are doing ( after you've finished reading this of course ) and go take a look. If you didn't feel like baking today then you will after looking at her fabulous recipes, and she's a great read to boot.
Great photography helps, not that she need it but it does get me motivated to get out of my rocking chair and into an apron.

I'm thinking about making the toasted marshmallow milkshake for breakfast...why not?

Friday, October 29, 2010

Halloween snackies.

I have two Halloween parties, one with kids and one without to go to this weekend, and need to take a snackie for both so I made this cute little dish just now and wanted to share it with you before all the festivities have come and gone......now you can all be as fantastic as me bahahahaha!!!!!!!
It's not baked yet but I don't imagine I'll be thinking to use my camera later to show the finished product all hot and gooey. I am having a cheat weekend and allowing my poor body some carbs, so I may crawl under a rock in shame for a while!!!!


The kids got to dress up for school today and had a chance to test drive their costumes before Sunday night, I'm a little worried about the warmness factor for Halloween night, I may need to pull a rabbit out of my hat to deal with that!!


Dace and I are going as a famous couple from the 80's..........any guesses?? HINT.......that's the back of my head!


Anywho, here's the recipe. Well its not really a recipe, more like instructions to yumminess.

Baked brie with cranberries and carmelised onions.

I purchased the largest wheel of brie I could find, you could go smaller, but really, why would you????
So its really easy....first carmelise some onions with lots of butter, olive oil, a little brown sugar and some port or balsamic vinegar. Get them all yummy and allow to cool.


I  used store bought PC brand cranberry and orange jelly, spread on top of the brie almost to the edge, and topped with the carmelised onions.
Roll out one package of puff pastry large enough to cover the top and sides of the brie and tuck as much as you can underneath, you want to encase the while thing if possible.
I trimmed a little of the pastry before this step to use for the web and spider.
Wrap up your brie as best as you can and decorate to your liking.
Bake this for about 15 minutes I'm thinking around 350c.

Happy Halloween everyone!

Friday, September 3, 2010

High Altitude Pavlova

I was recently at the local farmers market enjoying all the wonderful local produce and people watching with the kiddies, so sad that market season is almost over and yet again I have not been making the most of it.
The one new addition I noticed and was over the moon, crazy excited about was the aussie meat pie vendor. I was so happy about it, in fact my husband asked me if I "hooked up" with the meat pie man as I was raving about it so much when he got home.......MEN!!!!

At $5 per pie all my aussie readers are more than likely going to tell I was ripped off but seriously, YOU try going years without a good meat pie and see what effect it has on you. I think I would have paid double that for just one bite, this guys recipe was bang on.

My accent may have faded but my love of Vegemite and a good pie never will!

Seeing as that pie is still lingering on my taste buds I thought I'd post a recipe for another of my aussie favourites, however, in doing so may never be invited to another party as all of my friends will have my recipe.
Pavlova was one of those things I found difficult to make here in Canada, I believe its an altitude problem as there are so many eggs. So I stumbled across this recipe one day and have been using it ever since.
If any of my aussie friends try it I would love to know how it turns out for you.

ELIZABETH MANNING'S NEVER FAIL PAVLOVA - By Catherine Manning

6 egg whites
2 cups sugar
4 tbsp cornflour (cornstarch in the US)
6 tbsp boiling water
2 tsp vanilla essence
2 tbsp vinegar (white)

Put all ingredients in the bowl of an electric mixer and beat for 15 - 20 minutes or until very stiff. When you pull the beaters out, the mixture should stand up in stiff peaks. (I find at altitude, I usually have to beat the mixture for 30 minutes or more.)


Pile on to baking paper on an oven tray. You can also use aluminium foil on the baking tray. Lightly dust with cornflour so the pav won't stick. Pile it up high and do not spread out, as the pav will spread while cooking. Use a fork to mark ridges up the side.


Put in the middle of a cold oven. Turn the oven on to 250 deg F. Cook for 2 hours. Turn oven off and leave the pav in the oven, with door closed, overnight or until the oven is cold. This takes at least 6 - 8 hours. (Do not open the oven at any point during the cooking or cooling. Not even a quick peak!! This may cause the pav to fall.)
Kinda like this........my oven light was broken so I had to peek, but it still tastes the same!!


Cut around the top of the pav with a sharp knife and allow the top to drop into the pav. This forms a shell for the cream. Fill with whipped cream (NOT THE TYPE IN THE AEROSOL CAN) and decorate with fruit or topping of your choice.


I used a we little can of passion fruit that my friends and relatives bring me on their visits, I treat it like liquid gold as you can't find it here. And a grated up Skor bar. odd combo, next time I would use one or the other but not both, it was a little sweet.

LinkWithin

Related Posts Plugin for WordPress, Blogger...